Sunday, June 03, 2012

I miiiiiiiiissssed you

Hello my lovelies, Sorry I've been a lazy bum on the blog-front. Quite a few things have changed. a) I'm single again, so i'm left with much more time craft stuff up, b) my parents have moved to Sydney and I'm long term house+cat-sitting. Which also means a whole house to decorate with crafty goodness. Coming from a 2 bedroom flat to a 5 bedroom house, I just don't know what to do with myself. and c) I've rediscovered sewing.  I've been tempted by fat quarters for eons, but never had the room to set up a sewing space. WELL. that problem's solved so get ready to see sewing ideas on here as well. 


Better do a recap of what I've made lately to make up for my bloggish absence.


Photo: Finished!!  :-D http://instagr.am/p/LHlI_nqp2H/
My gorgeous granny square lampshade 
Photo: Lavender rice heat bag, pink corduroy is so sexy :-P http://instagr.am/p/LP0rDAKp_q/
My lavender corduroy rice bag
And just this morning, 
Photo
Teddy likes his outside strolls

Photo: Teddy is better at cam whoring than me lol http://instagr.am/p/LZSB-8Kpwm/
My ipod armband made from leggings

Jembellish has an a quick tutorial of how to make one up out of a tshirt, but i found my old holy pair of leggings worked as well. I just cut a piece of leg off at the end, folded it in half and sewed the top up (leaving a hole for the ipod to fall into) and sewed lines down to form a pocket. Now if only my teddy would do the walking for me as well as the camwhoring *sigh*

Ps. If you couldn't tell... I've discovered Instagram. Save yourselves.


Wednesday, February 22, 2012

Sugar n Cream ♥


Wanted to do something bright and fun with Sugar n Cream yarn, so I made a cover for my Kobo ereader. Holds it nice and snug too ♥♥

If you want to make one for anything that needs cozying, go here. Buhbye :D

Sunday, February 12, 2012

Easiest Geek Project Ever

Earbud headphones. You know them. Those things that sit in a drawer because you don't have the spare 20 hours to de-tangle them from the ball of cordy chaos that they have become. Well here's a nifty/trendy/quick solution that makes you feel almost bohemian. EARBUD CABLE COVERS!


 All you have to do is make a slipknot, then single crochet along inserting the hook under the cable as you would if it was a loose end. Continue along until you want to your earbuds to divide, then continue along just one of the cables instead of both. Tie off at the earbud and work in the loose end. To do the other single cable, just make another slip knot and start again where you first split the cables up. If it makes it any clearer, there's a Youtube video here by iuseamactx. Think if I make them with sock yarn and work out some cool colour patterns I wouldn't mind selling some at the local art and craft market. Because everyone needs a little colour in their lives :D

Don't forget to add me on Pinterest. Either click on the button on the right or click here.

Toodles xx

Sunday, January 01, 2012

Fimo Yarn Bowl Tutorial

Over the holidays, I've been figuring out how to make a yarn bowl from Fimo Polymer Clay. I see all these gorgeous bowls on Etsy, but I don't really want to spend $40 when I could make one myself.

Cooked, but unglazed
It took me three attempts to get one looking nice. The first one I made without a mold and it drooped over and looked floppy after it'd been cooked. The second time I used a mold but tried using spray cooking oil to separate it from the fimo and failed miserably. The spray must've dried up in the oven because I now have a bowl with incomplete fimo splodges stuck to the bottom. My third attempt has come out much more successfully, even though it's a lot thinner than I thought it would be. You can put the fimo on however you like, but I ♥ rainbow colours and I'm really happy how the twisted gradual colours came out :)

Materials:
  • Fimo
  • An old bowl to use as a mold (dessert bowls seem to be a good size for yarn)
  • A sharp tool for carving out a hole that the yarn can feed through
  • Aluminium Foil
  1. Wrap your bowl in Aluminium foil to prevent the Fimo from sticking.
  2. Start putting Fimo on your bowl any way you like. 
  • I started with a dark purple centre

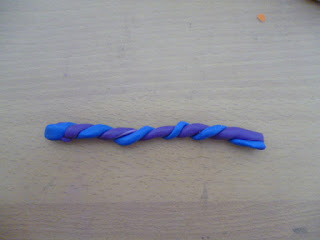
  • Then twisted purple and blue together and looped it around the purple circle and pushed it flat


  • I did the same thing for the rest of the colours so the rings went: 
  • Purple; Purple+Blue; Blue + Green

    Green + Yellow

    Yellow + Orange

    Orange + Red


The top is just each colour rolled out and stuck together, then pressed on neatly
         
  • Make sure when you reach the rim, don't put Fimo over the edge. I did by accident and after cooking I ended up having to break them off to remove the bowl.
    3. Use something sharp to carve out a curly spiral or hole for the yarn to be fed through for tension and guiding. 
   4. Cook in the oven on 110 degrees Celcius for half an hour, then let it cool. Once it's cooled down it should be fully set.  

In the oven.  My curl looked so pretty before it broke off.
    5. Remove the bowl and alfoil. 
    6. Glaze & enjoy :D

I'm really happy with how it turned out, but I might have to experiment with some air-drying clay or something a little cheaper. The Fimo has awesome colours, but it's a it expensive to buy enough to make the bowl thicker. 


Inside of the bowl
 Because of the New Year I can't get my hands on a brush to glaze it, but once I do I'll edit the tutorial and add a real finished photo. And yes, Merry Christmas and Happy New Year. One of my presents is waiting to be picked up at the post office, so once I've got that there'll be a Squee post :D

Happy Holidays!


Sunday, December 18, 2011

Reddit- My newest source of OMG

I always find a way to procrastinate. What I'm avoiding might change, from housework to Christmas Shopping, which deserves capital letters because of the doom associated with it. Or finishing off a project I lost interest in, but spent too much cash to hide in the UFO Cupboard of Despair (which again definitely deserves capitals).

My list of avoidance techniques however are very consistent:

Thursday, December 08, 2011

Zpagetti 3DS Case

I'm grinning from ear to ear, because in just one afternoon I've created my first pattern. This DS case is incredibly simple and using Zpagetti yarn it works up in no time. The fabric yarn is soft but sturdy, so it'll protect your DS if it gets dropped.

Sunday, December 04, 2011

Xmas Spoilers.... and a cat.

SPOILER ALERT!!

BELOW IS INFORMATION REGARDING XMAS PRESENTS FOR FAMILY MEMBERS.  DO NOT READ UNLESS YOU'RE A GRINCH AND HATE XMAS.

  HOWEVER, TO REWARD YOU FOR YOUR CONTINUED LOYALTY TO MY BLOG, HERE IS A VIDEO OF A CUTE STALKER CAT :D