Over the holidays, I've been figuring out how to make a yarn bowl from Fimo Polymer Clay. I see all these gorgeous bowls on Etsy, but I don't really want to spend $40 when I could make one myself.
 |
| Cooked, but unglazed |
It took me three attempts to get one looking nice. The first one I made without a mold and it drooped over and looked floppy after it'd been cooked. The second time I used a mold but tried using spray cooking oil to separate it from the fimo and failed miserably. The spray must've dried up in the oven because I now have a bowl with incomplete fimo splodges stuck to the bottom. My third attempt has come out much more successfully, even though it's a lot thinner than I thought it would be. You can put the fimo on however you like, but I ♥ rainbow colours and I'm really happy how the twisted gradual colours came out :)
Materials:
- Fimo
- An old bowl to use as a mold (dessert bowls seem to be a good size for yarn)
- A sharp tool for carving out a hole that the yarn can feed through
- Aluminium Foil
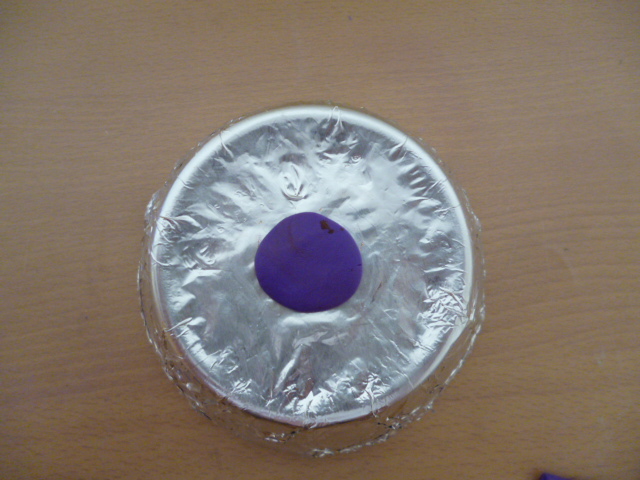
- Wrap your bowl in Aluminium foil to prevent the Fimo from sticking.
- Start putting Fimo on your bowl any way you like.
- I started with a dark purple centre
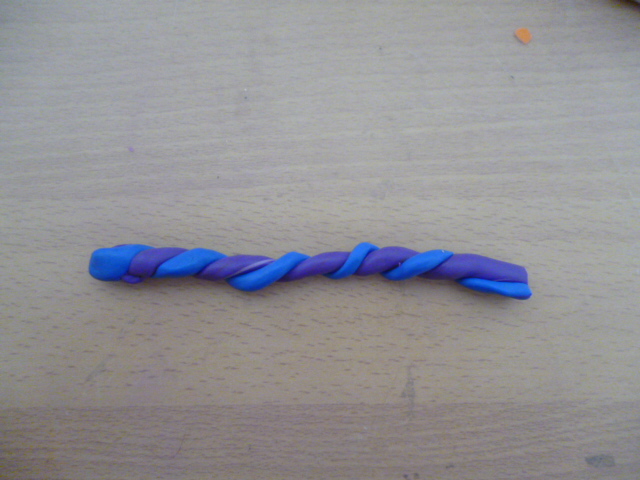
- Then twisted purple and blue together and looped it around the purple circle and pushed it flat
- I did the same thing for the rest of the colours so the rings went:
 |
| Purple; Purple+Blue; Blue + Green |
 |
| Green + Yellow |
 |
| Yellow + Orange |
 |
| Orange + Red |
 |
| The top is just each colour rolled out and stuck together, then pressed on neatly |
- Make sure when you reach the rim, don't put Fimo over the edge. I did by accident and after cooking I ended up having to break them off to remove the bowl.
3. Use something sharp to carve out a curly spiral or hole for the yarn to be fed through for tension and guiding.
4. Cook in the oven on 110 degrees Celcius for half an hour, then let it cool. Once it's cooled down it should be fully set.
 |
| In the oven. My curl looked so pretty before it broke off. |
5. Remove the bowl and alfoil.
6. Glaze & enjoy :D
I'm really happy with how it turned out, but I might have to experiment with some air-drying clay or something a little cheaper. The Fimo has awesome colours, but it's a it expensive to buy enough to make the bowl thicker.
 |
| Inside of the bowl |
Because of the New Year I can't get my hands on a brush to glaze it, but once I do I'll edit the tutorial and add a real finished photo. And yes, Merry Christmas and Happy New Year. One of my presents is waiting to be picked up at the post office, so once I've got that there'll be a Squee post :D
Happy Holidays!


No comments:
Post a Comment